Sorry I will be out this morning for a doctor appointment for my mother. I expect great work, quiet voices, and tons of creativity from you all!
Today you will be creating a pumpkin design!! Tomorrow we will be taking your design and taping it onto your pumpkin to transfer it. (MAKE SURE YOU HAVE A PUMPKIN TOMORROW!!!) If you do not choose to bring a pumpkin then you will be making Papel Picado.
Pumpkin and Papel Picado Design Process:
1. Get a white sheet of copy paper from my desk! DO NOT USE YOUR SKETCHBOOKS...
2. Research, for a few minutes, different designs and get some inspiration.
3. DO NOT DIRECTLY COPY AN IDEA FROM THE INTERNET. MAKE IT ORIGINAL!
4. Draw out what you would like for your design to look like.
5. Darkly shade in the parts that will be cut out. This part will be the part that glows if you are doing the pumpkin design.
6. The white of the page will be the pumpkin or the paper flag! Make sure it is all connected and that your design isn't too close for the pieces to hold together. This is why I need to check and approve your designs before they will be transferred to the pumpkins or onto the paper flags.
7. Turn in your design to the pink tray on my desk by the end of the period for a design grade.
Best wishes!!!
Tuesday, October 29, 2013

Guest Artist: Allie Reyna Recap!
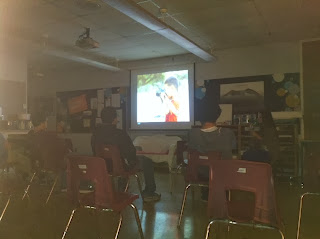
Yesterday we were privileged to have Allie Reyna come and speak to the art classes. She spoke about her career and life as an artist. She talked about her travels with YWAM and her adventures as a photographer. She spoke about her photography, inspiration, and life.
Some of the new vocabulary and photography terms she used were... catch-light, rule of thirds, and the golden hour. I want to see if any of my students actually check up on my blog. Therefore, if you are reading this, comment on this post about what you learned from Allie. I will give you a bonus grade of a 100 if you can also tell me what those three terms mean!
Here are some photos from the talk!


Some of the new vocabulary and photography terms she used were... catch-light, rule of thirds, and the golden hour. I want to see if any of my students actually check up on my blog. Therefore, if you are reading this, comment on this post about what you learned from Allie. I will give you a bonus grade of a 100 if you can also tell me what those three terms mean!
Here are some photos from the talk!


Friday, October 25, 2013
Negative & Positive Space Review
Space & Unity Review
Positive vs. Negative Space
Sketches for “Papel Picado” & / or PUMPKINS!!!
Thursday, October 24, 2013
Paint Day & Re-Teach for Elements and Principles
We will be having a re-teach day for those that failed their Elements and Principles Tests!
While I am re-teaching the rest of you need to be working on your paintings or other class projects.
Thank you, Mrs. Stewart
While I am re-teaching the rest of you need to be working on your paintings or other class projects.
Thank you, Mrs. Stewart
Wednesday, October 23, 2013
Happy Hump Day!
Value, Variety, Repetition & Pattern Review
View Emily Perkins “Zentangle” artwork on Flicker
Compare to Samoan Tattoo Designs!
“Google Images - Samoan Tattoos"
Warm Up 3 Assignment:
Application and practice for pen incorporation
into paintings. 4 Pattern value squares on your Warm Up Page.
WORK DAY!!!!!
Tuesday, October 22, 2013
Cross Contour Lines
Weekly Warm Up #2


Look at the three images by Beka Bielman. I would like for you to identify what type of balance Bielman is using in each of her tree compositions as well as the other elements and principles that are being used in each composition. Post your answers to the blog in the comment section. This will be 25% of your “Warm Up” Grade for the week.
*New Vocabulary – Cross Contour Lines
Art 1
Procedures:
After looking through Beka Bielman’s website see how you can use pen to enhance your watercolor designs. Once you are finished painting, practice adding ink to your design in your sketchbook first. I hope you will find a way to add line as well as enhance the forms within your designs by using her technique.
Evaluation:
Warm Up Grade
Sketchbook Ink practice
Project In-progress Check
Art 2-4
Materials:
Sketchbooks, Black Ink Pens, Variety of Objects
Procedures:
Cross contour line drawings in sketchbooks. These are not quick sketches! These are in depth studies of the objects, their values, and the cross contour lines that are implied. Rotate objects.
Evaluation:
Warm Up Post Grade
Submit your 2 best contour line drawings to be critiqued.
Monday, October 21, 2013
Monday, October 21, 2013
ART 1
Warm Up-"E & P Review: Color Schemes & Emphasis"
http://creativecolor.files.wordpress.com/2012/09/sheaffer-fountain-pen-vintage-sharpie-marker-watercolor-complementary0color-scheme-chris-carter-art-091312-web.jpeg


Post your answer in the comment section...
What is the color scheme in this watercolor painting by Chris Carter?
What is being emphasized in the painting and how is emphasis being achieved?
(This activity is worth 25% of your warm up grade for the week.)
Materials-
Watercolor Paints, Paint Brushes, Water & Cups, Rubber
Cement, Cellophane, Salt, Tape / alt. Exacto Knives, Blades, Matte Boards, Cutting
Boards
Procedures-
Teach Watercolor Textures & Techniques / Cutting Techniques
Watch You Tube videos by...Lorraine Watry
Work on Watercolor Paintings or Cut-out-designs inspired by "Charles Clary".
Evaluation-
Warm Up Grade
Shapes and Forms Drawing Grade
Take up test corrections
Monitor Individual Work Time
ART 2-4
Warm Up- (same as Art 1)
E&P Review
Materials-
Varied depending on projects
Distribute wood panels and paint primer.
Procedures-
Setting individual checkpoints & rubrics
One-on-one critiques & teaching.
Evaluation-
Warm Up Grade
Take up test corrections
Monitor individual work time.
Project Progress Grade
Subscribe to:
Posts (Atom)